As I mentioned last time, I went about this month’s challenge a little bit differently. I created several versions of my image before I posted about it.
My images for week 1 & 2 are similar enough that I am going to do the tutorials for them simultaneously. Truth be told, week 2’s image was a redo of week one where I made a small mistake that worked out. Anyhoo… let’s get to this tutorial…
I believe in giving credit where credit is due, I would not have been able to do these images without the book, The Artist’s Guide to GIMP – Creative Techniques for Photographers, Artists, and Designers by Michael J. Hammel (O’Reilly, Amazon).
-

- Week 1
-

- Week 2
You will need:
- A photo editor, I used GIMP*
- Your imagination
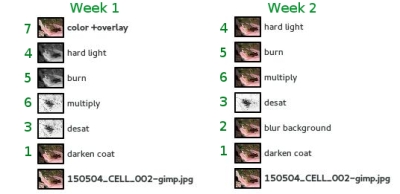
Tutorial – Quick Glance:
*** The order of the layers does matter, keep this in mind as you create the new layers. *** |
Detailed Notes:
1. (Optional) Darken objects in background.
In my image the background had an object that was light enough to draw too much attention to it, so I darkened it.
Duplicate base layer, using the color picker tool, choose color of item to darken (I chose a brown from the coat in the left corner). Paint area you want darkened. Change blend mode (I choose Multiply). Mask out items you don’t want darkened. Duplicate base layer again, then merge darkened layer with copied base layer.
2. (Optional) Blur objects in background.
I found that the background was still distracting, so for my week 2 image, I blurred the background.
Duplicate (base or darkened) layer. Using the Gaussian Blur Filter [Filters->Blur->Gaussian Blur] blur the background to your liking. Mask out the parts you don’t want blurred. Duplicate base (or darkened) layer again, then merge blurred layer with copied layer.
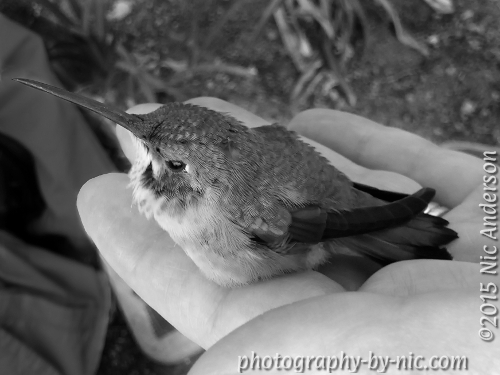
3. Desaturate image, edges, levels, invert.
Ok, now we get to the heart of this technique.
Duplicate (base or altered) layer. Desaturate layer [Colors->Desaturate], choose the option that makes your image look best, I choose Luminosity.
** Duplicate this layer — keep a copy of this layer around for further use later.**
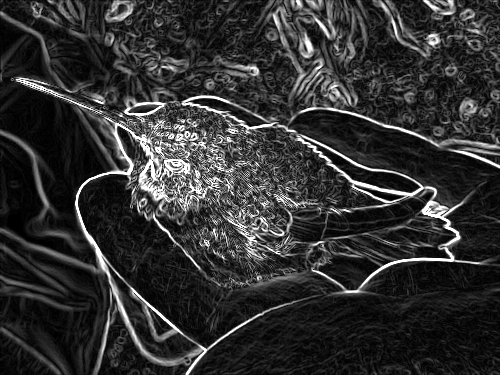
Using the Edge Detect filter [Filters->Edge Detect->Edge], I kept all the default settings, but feel free to check out the other settings for your image.
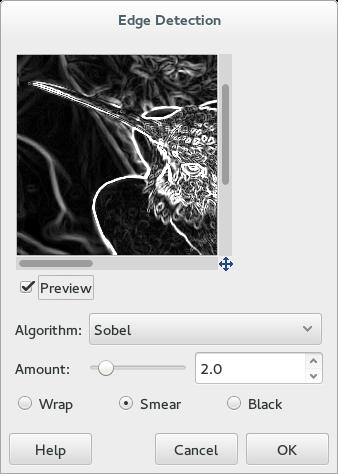
Your image should look something like this…
You can do this next part in two ways, either you work with the above image and determine how much white to maintain using levels, then invert… OR… invert and then determine how much black to maintain using levels.
Go to Levels [Colors->Levels] and pull the white slider to the left until you like the amount of lines created by the edges in the image, then Invert image [Colors->Invert] …
-

- Week 1
-

- Week 2
4. Hard light, gaussian blur.
Here’s where week 1 and week 2 start to diverge. For week 2’s image, I accidentally forgot to make a copy of the desaturated layer before the edges/levels/invert, so I did this to a copy of the altered base color layer (darkened and blurred).
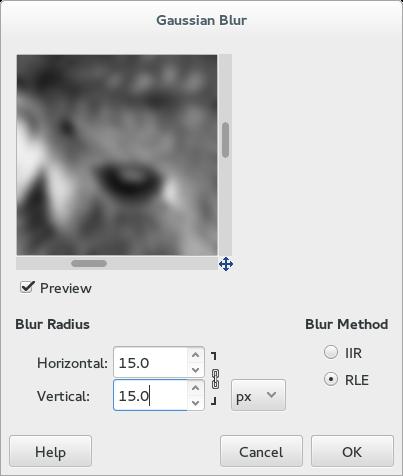
Duplicate the desaturated layer (or the altered colored layer). Apply a gaussian blur [Filters->Blur->Gaussian Blur] of about 15px horizontal and vertical.
Change the blend mode to Hard Light.
-

- Week 1
-

- Week 2
5. Burn, gaussian blur.
This layer will add some more depth to your image.
Duplicate the desaturated layer (or the altered colored layer). Apply a gaussian blur [Filters->Blur->Gaussian Blur] of about 10px horizontal and vertical.
Change the blend mode to Burn. Change the opacity to your liking, week 1 is set to 38%, whereas week 2 is set to 34%.
-

- Week 1
-

- Week 2
6. Multiply.
This layer will give your image even more depth.
Duplicate the desaturated layer (or the altered colored layer). Change the blend mode to Multiply. Alter the opacity to your liking, week 1 is set to 44%, whereas week 2 is set to 16%.
-

- Week 1
-

- Week 2
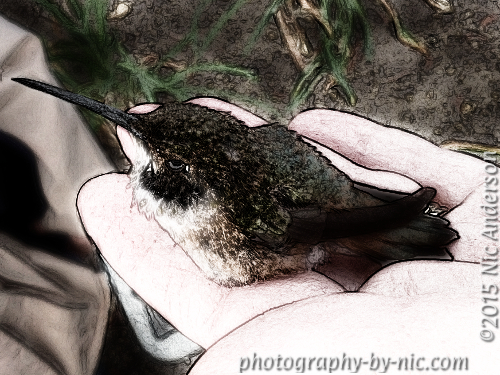
7. (Optional) Add color.
I wanted to add some color to week 1 (prior to knowing about how to do my week 2 image).
Duplicate the altered colored layer. Put it on top of the stack, and change the blend mode to Overlay.
I hope that you got something out of this tutorial and that you will try it (or parts of it) out. Please let me know if you do and tell me how it went.
Until next time…
~nic
* GIMP is Open Source software that is available for all platforms (Linux, Mac, and Windows), it is a photo editor that does many (if not all) of the things you can do in Photoshop. You can download it for free here. The GIMP online manual can be found here.

Like Wilber? You can get him here.
I have joined a month-long photo post-processing challenge called One Four Challenge, hosted by Robyn at Captivate Me. “This challenge is about processing 1 image in 4 different ways over 4 weeks.” Every Monday Robyn posts a new version of her photo and challenges us to do the same each week.
